Baby View Mirror
My first project I'm going to share is a "Baby View Mirror". You know, these?
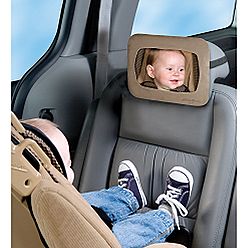
They retail from $13- $25.
My cost?
$1.07 + other materials I had on hand.
MATERIALS:
1. Dollar store mirror
2. Felt
3. Material
4. Ribbon
5. Buckle Clips
6. Hot glue/ gorilla glue
Start with a Dollar Store Mirror:

Clip the handle off the end of the mirror. I had my husband do this. At first, I was thinking to saw it off-- but we found big clippers would just clip them off a lot easier.
Cut white felt (for a soft stuffing). I did two pieces for each side. Two for the front in a TV-box shape. Two for the back in a box shape, surrounding the mirror.


Then I did the same thing with my materials, but I made it a bit bigger. One for the front in a TV-box shape. One for the back in a square shape.
(When I did this project I didn't plan on sharing it with anyone-- so I didn't take very many pictures to explain what I was doing-- hopefully you can get the idea of what I'm talking about.)
We have a bunch of these toggle-clip-buckle things that we've gotten for free at various places (BYU games). What are they called?
Cut the ribbon off so you have just the clips.

Put your own ribbon through the clips and sew them down.
Place the ribbons on the inside in the center of each side.
Sew all the material on the inside (right faces) together (with the ribbons still in the center). Flip everything just sewn outside and insert the mirror.

Last step: Hot glue the material to the mirror on the front to hold it down.
(I made this project almost a year ago and the hot glue is starting to pull off, so I think gorilla glue might hold it in its place better.)

This project was very fun and very useful. I love to smile at my happy baby girl in the back!


Comments