Mod Podge Photo Transfer Canvas + free printable


A couple of weeks ago I received a sweet, new product from Mod Podge. I was so excited to try out their new Mod Podge Photo Transfer medium.
This is a really awesome way to transfer any image from computer paper on to any hard surface or fabric. If you need an image transferred permanently, this is the way to go!
I decided I wanted to make something to go in my girls' room. As you know I'm working on the room to add girly, pink elements for my daughters. As I was contemplating what design to add to my canvas I thought of making a print that said, "I am a child of God"-- but then I thought about it more and thought about the fact that I'm making this for my daughters and I thought of the theme, "We are daughters of our Heavenly Father who loves us and we love him." I thought that would be more appropriate and dear for my sweet girls.
Excitedly I made this print, which you can print for yourself HERE.

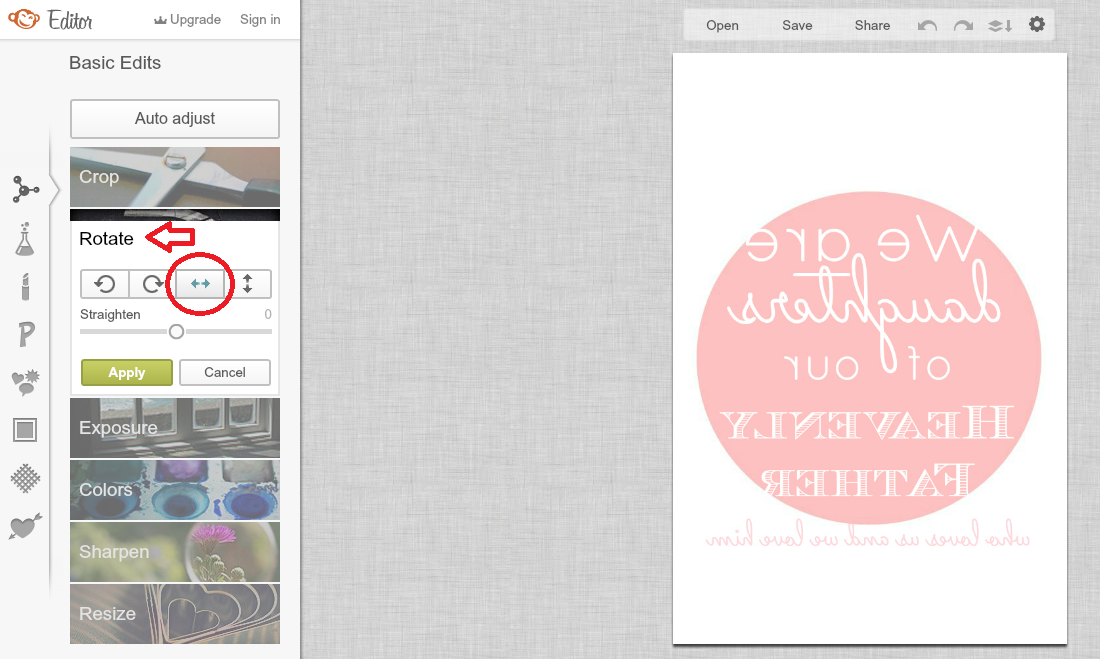
Because this medium does the exact reverse of your image I uploaded it into PicMonkey and flipped my image.
Here's how to make your own Mod Podge Photo Transfer Canvas.
MATERIALS NEEDED:
1. Print out of your image on plain computer paper from an Inkjet printer (Remember if your image has words to reverse the image.)
2. Mod Podge Photo Transfer Medium
3. Canvas
4. Ribbon
STEP ONE: Gather your materials.

STEP TWO: Cut out your image to be the exact size of your canvas.
STEP THREE: Cover your entire image with the Photo Transfer Mod Podge.

STEP FOUR: Make sure the entire image is covered about 1/16" thick.
It needs to be so thick, that you can't see your image.
STEP FIVE: Place the image on top of your canvas. Smooth it down with your fingers.
STEP SIX: Leave it alone to dry for 24 hours. Do not touch it.

STEP SEVEN: After 24 hours, it's time to reveal your image. Take a washcloth or sponge and wet the top of the canvas. Wipe away the paper and reveal your image underneath.
Your photo has been transferred.

All done! Everything's been transferred. So fun and so easy.
I really loved how it turned out....but I felt like it needed a little more Omph.

So I grabbed some more mod podge (this time the regular gloss kind) and some matching ribbon.

My last step was to mod podge a ribbon around the edges + front and mod podge everything together to seal it all up.


Now I'm really all done. Love it!


Looks so lovely in my girls' room.

For More Inspiration on Plaid Products + Mod Podge please visit:
Mod Podge


This post was written as part of a campaign with The Blueprint Social. All opinions are my own.


Comments
Bonny @ thedomesticatedprincess.com
Jamie ~ Better With Age
As you can see here Canvas = great.
t-shirt = fail.
glass mug = fail.
It has a learning curve, for sure. And is not right for all surfaces.